File Manager
The File Manager is a tool to that allows you to view, manage and organize your files. It also has several features that help make it easier for you to work with these files.
Uploading, Deleting and Viewing Your Files
The File Manager is a tool to that allows you to view, manage and organize your files. It also has several features that help make it easier for you to work with these files.
Uploading a File
- Select the Files Tab in the Admin Menu.
- Click on Upload.
- The File Upload screen will be displayed on the right side of the SIMS Interface.
- Click on the Browse button, and locate the appropriate files from a folder on your hard drive. Alternatively, you can also drag your desired files from your hard drive into the browser.
- If you wish to remove an item from the list, you can click on the -minus icon, which will be listed after your files are listed in the queue. If you wish to remove all items from the queue, you can also click on the Clear button to the top right.

- In the opposite field, you have additional options for what to do with the files.
- Name Conflicts: You can choose what you want the uploader to do incase of any name conflicts (two files having the same name). By default, they will be renamed but you can also choose to overwrite them.
- Upload Files to Folders: Here you can choose where you wish to place the files based on file type. By default they are placed in their file type roots, but you can specify where they go in the dropdown menu or create a new folder to place them in by slecting the Create Folder icon.
- After you have selected all the files you wish to upload, click on the Upload button.
- Once your files begin to upload, the progress bar in the bottom will begin animating as it progresses. Once completed, the bar will be full and will indicate “Upload complete!”

along with the number of files uploaded, the size of the files uploaded and the time it took to complete. Your file(s) will automatically be located in the appropriate directory in your File Manager. - The File Upload List will display the files you have uploaded.

Tip!
Deleting a File
Once you have uploaded files, you may want to delete ones that you no longer use. This is what the File Manager is for. You will only have the option to delete files if you have been given Superuser Privileges.
- Select the Files Tab in the Admin Menu and then select Browse.
- The File Manager will be displayed within your browser.
- The File Manager separates the types of files displayed through the topmost dropdown menu. By default it displays images. You may also display documents, templates, audio/video or flash. Selecting an option from this menu will automatically update the list of files displayed.
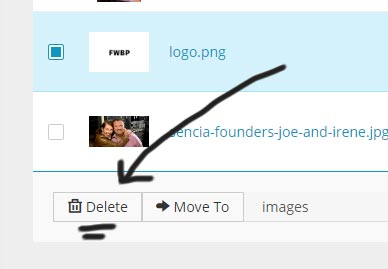
- To select a file to delete, click the checkbox on the left of the file name.
- Click the Delete button on the bottom of the list of files. The selected file(s) will be deleted.
Important:
Deleting a file is permanent and can not be undone. The only way to undo this action is to re-upload the file.

Organizing Files
You can help organize your files more by separating them into folders.
Note:
Creating a Folder
- Select the File Tab in the Admin Menu and then select Browse. This will open up the File Manager.
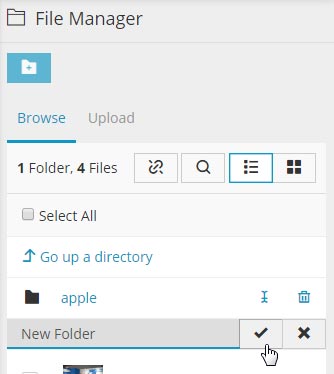
- At the very top left of the File Manager screen, select the Create Folder icon.

- In the File Manager screen, a new folder will show up, it is automatically selected.
- Enter the desired name of your new folder, and then click the check mark when you are finished.
- Your new folder will be created (folders are listed alphabetically)
If you want to change the name of a folder already created, you can click on the Rename icon to the right of the listing. ![]()

Moving Files to a Folder
- Select the File Tab in the Admin Menu and then select Browse. This will open up the File Manager.
- To select a file to move, click the checkbox on the left of the file name. You can select as many files as you wish to move.
- In the very bottom of the screen next to the button Move To, click on the dropdown list and select which folder you want to move your files to.
- Click on the Move To button.
- Your files will now be moved to your desired folder.
Image Resizing
The SIMS Image Resizer is used to resize and resample your images to properly fit into your website. You can also use this tool to create thumbnails (smaller, sample images) for use in your articles. This is an additional paid add-on, however, we highly recommend this incredibly useful tool. Inserting images from your digital camera or your scanner will be far easier.
The SIMS Image Resizer may accessed through the Insert File Window from the SIMS Editor or through the File Manager.
Resizing an Image
- Select the Files Tab in the Admin Menu, and then choose Browse. This will open the File Manager.
- Click on the image you would like to resize on the left.
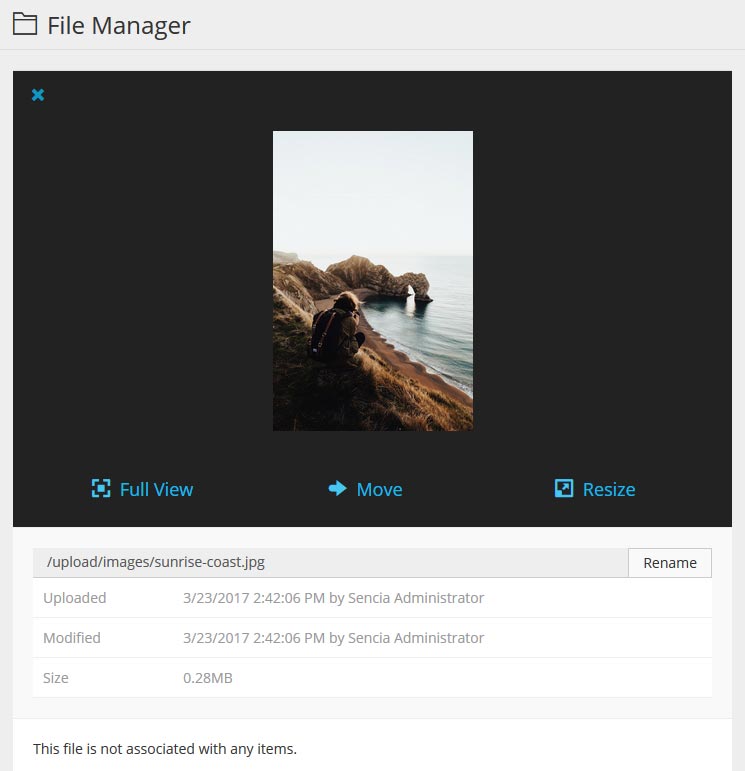
- A preview section for the image will show up on the right. Click the Resize icon.
- The SIMS Image Resize Tool Interface will now open.
The Image Resizer Window!
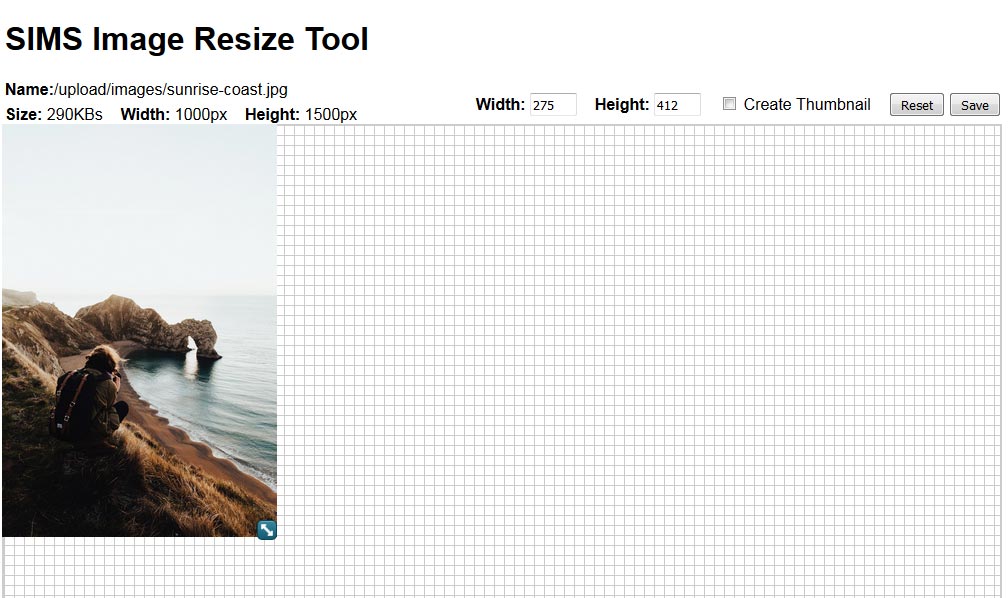
The left side of the SIMS Image Resizer Interface contains information about the original image. This is such as; the Name, Size, Width, Height and Website Content Area Width are displayed.

To resize your image
Enter the height (or width) you want your image to be, then press enter (or click anywhere else within the window. The number will automatically adjust for the opposite side (height or width).
Alternatively, you can click and drag the Resize Handle in the corner of the image.
When resizing, take note that your image dimensions will not be skewed; the aspect ratio of the image will remain intact. This is done automatically to prevent awkward looking images.
Info:
Info:
Changes made to your image will not be saved until you click the Save button. Feel free to experiment.
To revert the image back to its original size, click the Reset button.
Click the Save button when you are completed resizing your image. You will be shown your resized image to ensure your changes have been made successfully.
If you are satisfied with the resizing result, click the Close button to close the SIMS Image Resizer Window. If you would like to make additional changes to the image, click the Back button.
The Image Resizer Window
The left side of the SIMS Image Resizer Interface contains information about the original image. The Name, Size, Width, Height and Website Content Area Width are displayed.
- Name: This is the filename of the original image file.
- Size: This is the file size of the original image file.
- Width: This is how many pixels wide the original image file is.
- Height: This is how many pixels tall the original image file is.
Creating a Thumbnail
Take note, also, of the Create Thumbnail option. If checked, this option will generate a smaller, more quickly-loading copy of the image (a thumbnail) for use on your website. Since loading images can take time depending on their file size, thumbnails are an excellent way to display a “quick miniature" of the full-sized image.