Creating an Article
In SIMS, an Article is an individual page in your website. The term Article is used to more easily distinguish between webpages and websites. (ie: Your website contains several webpages, referred to as articles.)
- Click on the Articles Tab in the Admin Menu to expand your options.
- Select the first option Create Article.
- The SIMS Editor will now open up on the right side of the screen.


Article Details
The first thing that you should do before adding your page content is to add your article details (a Menu Title, Header Title, and Page Title). What are these?
Menu Title
This is the text that will appear on your main navigation menu. This should be kept fairly short, though not at the expense of clarity, as this will be what your visitors will be presented with to navigate the website. In short, this should be clear and concise.
Header Title
This is the text that will appear in your browser's header tab when you view the article.
For example, the Header Title of this article is "Articles"
Page Title
This is the text that is used as a header on the article, displayed at or near the top of the page, typically in a larger font. This text will also assist in Search Engine Optimization. Think of the Page Title as the equivalent of a Chapter Title for a book.
Redirect URL
You can select this option to redirect the article to a file, another article or an external website.
Selecting the file icon will allow you to select a file from the File Manager. Selecting the page icon allows you to select a page on the website. To link to an external website, copy the direct URL and paste it into this field.
Alias URL
Here you can set up an alternate URL visitors can use to reach this article. Example: setting “about” as the Alias URL will allow visitors to reach the about article by typing in www.domain.com/about
Publishing Details
This section can be used to set publishing information, such as for articles you want to publish on a specific date, or for articles you only want available on your website for a limited time. This feature uses a YYYY/MM/DD 00:00 am format.
Publish Date
The Publish Date feature is used to set a specific date when you want an article to become available. For example, you may use this feature to create a news story to be released in the near future.
To set, simply click into the Publish Date field, or on the calendar icon next to it. A calendar will appear and allow you to navigate to your desired day and time. Alternatively, you can enter in the date manually (just be sure to follow the correct format).
Expire Date
The Expire Date feature is used for articles you want to make available only for a limited time.
To set, follow the same steps as above for the Publish Date feature.
To exit, cancel or remove a date:
To cancel selecting a date, hit the enter key on your keyboard. To remove a Publish Date or Expire Date, select the approipriate field, hit the backspace key on your keyboard to remove the date and then press enter.

Meta Details
Meta details can be added to each article to help with SEO (search engine optimization), which makes it easier for people to find your site's content.
Keywords
For Search Engine Optimization, choose words here that are relevant to your article, separating words &
phrases with a comma. Think about the search terms and phrases your visitors are likely to enter on a search engine, and avoid using esoteric terms (such as esoteric).
Description
You can add a brief description of your page here. These descriptions are used by search engines to use as a content preview snippet for search result pages.
It is best to keep meta descriptions beween 150 and 160 characters max. Descriptions longer than 160 characters may be truncated by search engines. To make limiting descriptions easier, the description panel includes a character counter along the bottom of the field.
Attachments
For most articles, the Attachments panel can be ignored. This feature is implemented on a site-by-site basis. If there is a potential use-case on your SIMS site, please let us know and we can discuss it.
Article Image
This section is reserved for special uses, such as images that display as previews in a news feed, images in a fader/ slider, or in other customized ways.
Article File
This is similar to how an image can be attached to an article, though they are controlled separately. As with the Article Image, the Article File will be implemented on a site-by-site basis.
Permissions
The Permissions panel is used to control some article security features as well as article visibility on search engines.
Article Groups
Here, articles can be assigned to groups.
This is an optional security feature for articles.
Learn About Article GroupsIncognito Mode
For pages you do not wish to be indexed by search engines, you may select the Incognito toggle. This feature will strongly encourage search engines from indexing the page.
Once selected, you can also opt if you would like to apply Incognito mode to all children (sub menu items) of the current article.

Lock Article
Here you can toggle Article Lock.
Save your work!
Note!
Note!
The SIMS Editor
 The SIMS Editor will be most beneficial for those who do not know HTML, though those experienced with HTML may enjoy using it for its ease of use. If you would rather work in HTML mode, you can also do so by clicking on the Advanced Source Editor Icon. The SIMS Editor makes tasks such as formatting text, inserting tables, and adding hyperlinks and images easy, allowing you to concentrate on your website's content.
SIMS Editor Tools
The SIMS Editor Tools are standard icons that will likely be very familiar to you. We have provided a brief description of each item and its function below.

Adding Content
You have three choices for adding content:
- You may type the content directly into the Publishing Window.
- You may copy and paste content that you have already created in a word processor, though this is not recommended.
- You may upload and insert an existing HTML document that contains your content.
Adding existing content from a word processor
- Open your document in the proper word processing program.
- Using your mouse, select and copy (or cut) the desired text.
- Paste the content into the Publishing Window of the SIMS Editor. Either use the Paste icon, or use the hotkey (ctrl/ command V)
If you are pasting from an external source, use the Paste as Text icon. This will strip any additional formatting that the content may have and prevent any style consistancy issues on your website. In all other cases, use the Paste button.
Note!
When pasting from a Word Processor using the Paste button (and not the Paste as Text icon), the SIMS Editor will retain all extra formatting: tabs, spaces, tables, fonts, font sizes, and so on. While this initially may seem desirable, it reduces the accessibility of the article you are authoring. This may have a negative impact on usability of your website.
For best results, use the Paste as Text icon, though copy & pasting content is not recommended.
Insert an existing HTML file
- Upload your existing HTML file using the File Manager.
- Either open an existing article or create a new one.
- Select inside the Publishing Window of the SIMS Editor where you want to insert the uploaded HTML file.
- Inser the file via one of two methods:
- Select the Insert File button at the top of the page

or - From the Insert menu at the top of the editor, select the Inser File option.
- Select the Insert File button at the top of the page
- The Insert File Window will open.
- Select the template you wish to use from the dropdown menu, then select OK.
- The template will now be inserted into the SIMS Editor.

Inserting Files
The SIMS Editor allows you to insert photos, graphics, HTML pages/ templates, videos, and other rich content directly into your article. This functionality is accessed through the Insert dropdown at the top of the SIMS Editor.

Inserting a FIle
- Select inside the SIMS Editor Publishing Window where you would like to insert the file.
- You may insert a file in one of two ways:
- From the Insert button at the top of the Publishing Interface, select the type of file you would like to insert (Video, Image, Link, etc.)
or - From the Editor, select the appropriate icon for the file type you would like to insert (Video, Image, Link, etc.)
- From the Insert button at the top of the Publishing Interface, select the type of file you would like to insert (Video, Image, Link, etc.)
- The Insert File Window will open.
- Selecting the File Manager Search Icon

- Locate your file within the File Manager.
- Choose Select.
- You may now add additional details for your file, such as Image Description (images), Title, dimensions, etc. When complete, select OK.
- Your file will be inserted into the publishing window at the location you specified in Step 1.
Creating Tables
- Click the Insert/Edit Table icon on the SIMS Editor Toolbar.

- Next to the Insert Table dropdown, select the desired approximate size of your table (grids, columns) - you can always add more rows/columns later as required.
- Once you are done, click the grid.
- Your table will be inserted into the article.
Editing & Formatting a Table
- Select the table within the SIMS Editor that you would like to edit and the Table Options menu will appear:

- Choose the appropriate option. You may edit settings, such as table width, height, cell spacing, cell padding, border or alignment. You may also wish to add or remove cells, rows or columns, or even delete the entire table.
- Alternatively you can select the table you would like to edit and then from the toolbar Insert/Edit Table Icon , select Table Properties. You will be presented with a number of editable properties.

Table Terms
When the Table Properties Window opens, you are presented with many options. Here are some explanations of terms:
Cell Spacing
This value specifies how much spacing there will be between table cells.
Cell Padding
This value specifies how much padding
there will be on the inside of cells.
Alignment
Sets the alignment of the table in your content area.
Border
This value specifies how thick the border on the table should be. To remove the table border, enter 0. The higher the number, the thicker the border.
Width
This value specifies how wide your table will be. A newly created table is defaulted to 100% the width of your screen or containing column. You may also set it to a specific width in % or px value.
Height
This value specifies the minumum height of your table.
Class
If you have a custom class created for tables, you can assign it to the table by selecting it from the dropdown list. Otherwise leave this blank.
Table Caption
Selecting this option will give your table a caption (or title), which you can edit after you insert or update your title.
TIP!
Cell and Row Properties
- To set cell and row properties, select the cell or row wihthin the SIMS Editor that you wish to edit and then right click.
- Table options will appear within a menu.
- Hover over to the cell (or row) and select Cell (or Row) Properties.
Cell Properties:
- Width: Define the width (in % or px) for the selected table cell
- Height: Define the height (in % or px) for the selected table cell
- Cell Type: Set the cell type as cell (default) or Header Cell (for table headings)
- Scope: Set if you would like the cell properties to apply to all cells within a row, column, row group or column group. For example, you may wish an entire row become Header Cells
- H Align: Set horizontal alignment for content within the selected cell (none, left, center, right)
- V Align: Set vertical alignment for content within the selected cell (none, top, middle, bottom)
Row Properties:
- Row Type: Define the purpose of the selected row (body, header, footer)
- Alignment: Set alignment for the selected row's content (none, left, center, right)
- Height: Define the height (in % or px) for the slected row
Adding or removing Rows or Columns
- To add or remove a row or column, you may do so in one of two ways:
- Select the row or column you wish to remove within the SIMS Editor and then right click. If you would like to add a row/column, select a cell closest to where you would like the row/column added and right click.
- Table options will appear within a menu.
- Hover over the Row or Column option.
- Select Delete Column or Delete Row.
Formatting Content
You can either format your text as you are creating your article, or apply formatting to existing text.
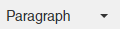
Heading Styles
Options include : Paragraph (default setting), Address, Preformatted and Heading sizes 2 through 6.
To Apply Heading Style :
- Select the area you would like to format by selecting within a line of text.
- Click the Heading Dropdown menu and select the style you wish to use.
- The style will be applied to your selected area.
Font Styles
Options include : Bold, Italic and Underline. You may also apply other inline styles such as strikethrough, Superscript, Subscriptand code
To Apply Font Style:
- Highlight the text you wish to format by clicking and dragging the mouse cursor over the text.
- Click on either the Bold, Italicize, or Underline icon. You may also click within the Styles Dropdown for options such as; Strikethough, Superscript, Subscript or Code.
- The appropriate style will be applied to the selected text.
Aligning Content
Left Aligned
Center Aligned
Right Aligned
To Align Content:
- Highlight the text you wish to format by clicking and dragging the mouse cursor over the text.
- Click on the Left Align, Center Align, or Right Align button.
- The appropriate alignment will be applied to the selected text.
Creating Lists
Ordered Lists
An ordered list is commonly referred to as a “numbered list”. An ordered list is identical to an unordered list, but the list marker is a numeral, instead of a circle. Examples of ordered lists include the lists on this article, as they are prefixed by numbers.
- Click in the Publishing Window where you would like to place the ordered list. (Alternatively, if you would like to turn text that already exists into a list, you may highlight the text by clicking and dragging the mouse cursor over the text.)
- Click on the Ordered List button.
- To add another list item, hit the Enter key on your keyboard. A new line with a prefixing number will be created.
Unordered Lists
An unordered list is commonly referred to as a “bulleted list”. Each item in an unordered list is marked by a bullet. For the purposes of this example, the following instructions are contained in an unordered list.
- Click in the Publishing Window where you would like to place the unordered list. (Alternatively, if you would like to turn text that already exists into a list, you may highlight the text by clicking and dragging the mouse cursor over the text.)
- Click on the Unordered List button.
- To add another list item, hit the Enter key on your keyboard. A new line with a prefixing bullet will be created.
Hyperlinking
Adding Links
- Add the text or image that you wish to turn into a link to the SIMS Editor Publishing Window if it is not already added.
- Highlight the text or image by clicking and dragging with your mouse.
- Click the Insert/Edit Link icon. The Hyperlink Properties Window will open.
- Enter the appropriate information into the Hyperlink Properties Window.

Adding Internal, External and Email Links
Link URL
Link to a file in the Media Library
If you select the Media Library Icon, you can insert a link to media in your Media Library. Upon clicking the Media Library Icon, the Media Library Selection Window will open, where you may select the media you wish to link to from the drop down menu.
When you have selected the file you would like to link to, click the Select button. The Media Library Selection Window will then close, returning you to the Hyperlink Properties Window.
Link to an Existing Article
If you select the Browse Articles Icon, you can insert a link to another article on your website. Upon clicking the Browse Articles Icon, the Article Selection Window will open, where you may select the article you wish to link to from the drop down menu.
When you have selected the article that you would like to link to, click the Select button. The Article Selection Window will then close, returning you to the Hyperlink Properties Window.
Link to an External Website
First copy the URL of the website or external page that you wish to link to. Select the input box next to Link URL and paste it into this section.
You may want to change the target to open in a new window (_blank) for continuity purposes on your website.
Create an Email Link
In the input panel under Link URL type mailto:emaill@email.com
(replacing email@email.com with your desired email address).
Rel
Target
Title
Type a short description of the link in this field. This text is displayed to the site visitor when they hover their mouse over a link for a moment, and is an important usability feature.
Class
If you have a custom class set for links, you can choose to add it here, otherwise you can just leave this blank.
When you have entered all the information required, click the Insert button. The text or file you entered into the Link URL field will now be a link.
Editing Navigation
After you have created and saved a new article, it will automatically be stored in the Article Bin . You will need to assign it to a Parent Article for it to be visible in your main navigation menu. SIMS will automatically create a navigation menu link once your new article has been assigned under a Parent Article.
Assigning Parent Articles / Modifying The Root / Main Menu
Parent Articles are your "main navigation items." To add addtional Parent Articles, you will need to contact SIMS Support Team, as adding main navigation items may require design and layout consideration.
Assigning a Child Article to a Parent Article / Adding Submenu Articles

- Create a New Article that you would like to become a new menu item. It will automatically be placed in the Article Bin.
- Select the Articles Tab in the SIMS Admin Menu to display your Parent Articles. These are your main navigation items, where we will be assigning "sub navigation items" to.
- Select the Parent Article you would like your new article to be a child of. The Article Properties screen for the selected Parent Article will open.
- Click the Edit Navigation button located on the top left side of your browser.
The Navigation Management screen will now open. On this screen, you will see a list of articles in the Article Bin as well as a list of the current Child Articles (if any) for the Parent Article you have selected.
Select the article you would like to make a child from the left column, and click the right arrow to move articles from the Article Bin into the navigation menu.
When you have completed modifying and arranging your navigation menu, click the Save button to ensure your changes are saved. After you save, the changes to your website’s navigation menu are instantaneous.
Your article is now activated as a Child Article to the Parent Article you selected in Step 3.
NOTE
You can assign as many Child Articles as you want to a Parent Article. Child Articles can also have Child Articles of their own.
A Child Article can only be assigned to one Parent Article. However you can link a Child Article from any other Article using Redirect URL.
TIP! Alternatively, you can click on an item from the Article Bin panel and drag it over to your Article Navigation panel.

Article Sections

Article Sections are available on some websites and are used for multi-site websites (such as multi-lanuage or multi-section websites). They provide a way to easily switch between editing navigation and content from one version of a website to another. If you have Article Sections available, you will find Article Section dropdown under the Articles Tab in the Admin Menu.
If your website does not use multi-sites, the Article Section dropdown will not be visible. That being mentioned, multi-site websites setup prior to 2015 might not use Article Sections and editing navigation will be similar to modifying sub-navigation. For more information, please contact our support team for details on modifying your multi-site website.
Article Visibility
From the Article Properties window, you can toggle an article as either Visible, Hidden, or Disabled.

TIP!
Visible
A Visible article will be included in the Navigation Menu of your website, and will be visible to all site visitors.
Hidden
A Hidden article will not be included in the Navigation Menu of your website, and will not be ordinarily visible to site visitors. A Hidden article can, however, be accessed directly if the visitor has, for example, bookmarked the article. It is not easily accessible, but it may still be accessed.
Disabled
A Disabled article will not be included in the Navigation Menu of your website, nor will it be accessible to visitors either directly or indirectly. Any visitor, who is not logged into your SIMS Administration Panel, that attempts to view the article (through a bookmark, for example) is given a 404: File Not Found error.
Copying Articles
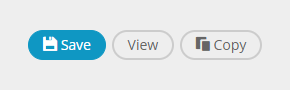 To copy an Article, open the article you wish to copy and select the Copy link. A copy of the current article will be saved and added to the Article Bin.